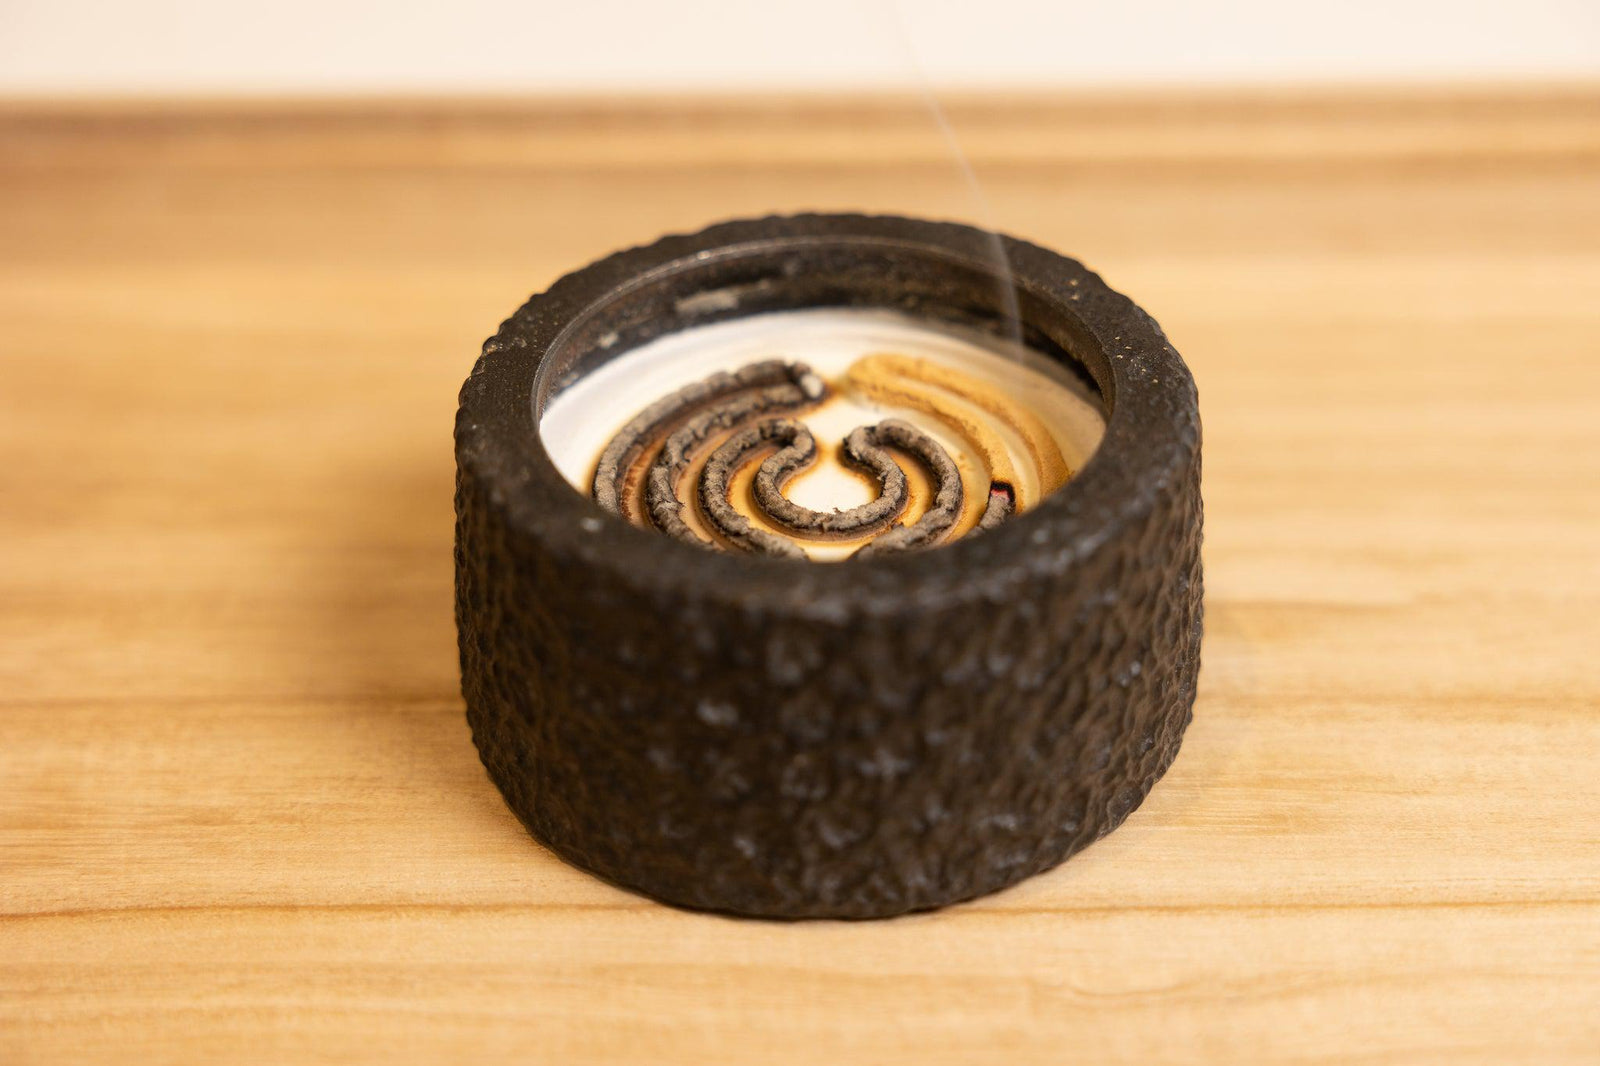
Burning incense powder refers to the traditional Chinese practice of zhuan xiang (篆香 ) or yin xiang (印香), which literally translates into creating an incense seal or incense stamp from incense powder. It is also sometimes referred to as an incense trail in English.
In this method, a mold (traditionally of a seal, but can be of any pattern) is placed on a bed of firmly pressed ash, which acts as a heat resistant surface. Loose incense powder is then spooned into the mold, and once the mold is removed, it leaves the shape of the seal. This is then lit, and very elegantly burns from one end to the other. (Note no charcoal is involved in this method of using incense. )
For those of you who would like to try this yourself, please read on for a comprehensive guide with video instructions. (As a side note, we also offer similar instructions for using incense sticks and using backflow incense cones).
The History of Burning Incense Powders
The practice of zhuan xiang or burning incense seals began in the Tang Dynasty (618–907). The Chinese word zhuan (篆) actually comes from the phrase for seal script (篆书), an ancient style of writing Chinese characters that evolved from Oracle Bone Script. By Tang dynasty however, this style of writing had largely been reduced to decorative purposes, and used mainly in engraving seals (official name chops or signets). We can guess from this name that incense seals probably first began when notable families wanted to have their seal created with incense powder, and other patterns evolved from there.
The practice soared in popularity in the subsequent Song Dynasty (960-1279). Song intellectuals enjoyed this method of using incense for several reasons. First, they could showcased their artistic flair by designing their own seals; second, the process of ash pressing and forming the incense powder seal is calming and meditative.
As with many other traditional Chinese arts and crafts, the practice of zhuan xiang was almost lost in the last century due to wars and revolutions. Fortunately, the practice has seen a revival in the past decade, and we hope to contribute to this. As we face an increasingly uncertain future, the benefits of a moment to stop and be fully present in a ritual like this is undeniable.
What is incense powder?
The incense powder used for making incense seals or incense trails comes from all natural dry ingredients. It is the same powder used to make incense sticks or cones, except that binding agents are not required (in Chinese or Japanese incense the binding agent is nanmu or tabu noki). The raw ingredients are mostly plant matter such as woods, flowers, herbs and resins.
When making incense trails, you can choose to use single ingredient powders such as sandalwood powder, or incense powder blends.
Tools and Other Items Needed for Burning Incense Powders

Before starting, please prepare the following:
-
A fire-proof incense burner - look for one that is relatively shallow with a wide mouth opening
-
Ash - typically store bought white ash is used
-
Incense powder
-
Incense powder mold
-
Lighting device - a small stove lighter or kitchen torch is best, as the long snout for the flames helps with pinpointing the starting point of the trail. Sometimes a lit incense stick is used in lieu of a lighter
-
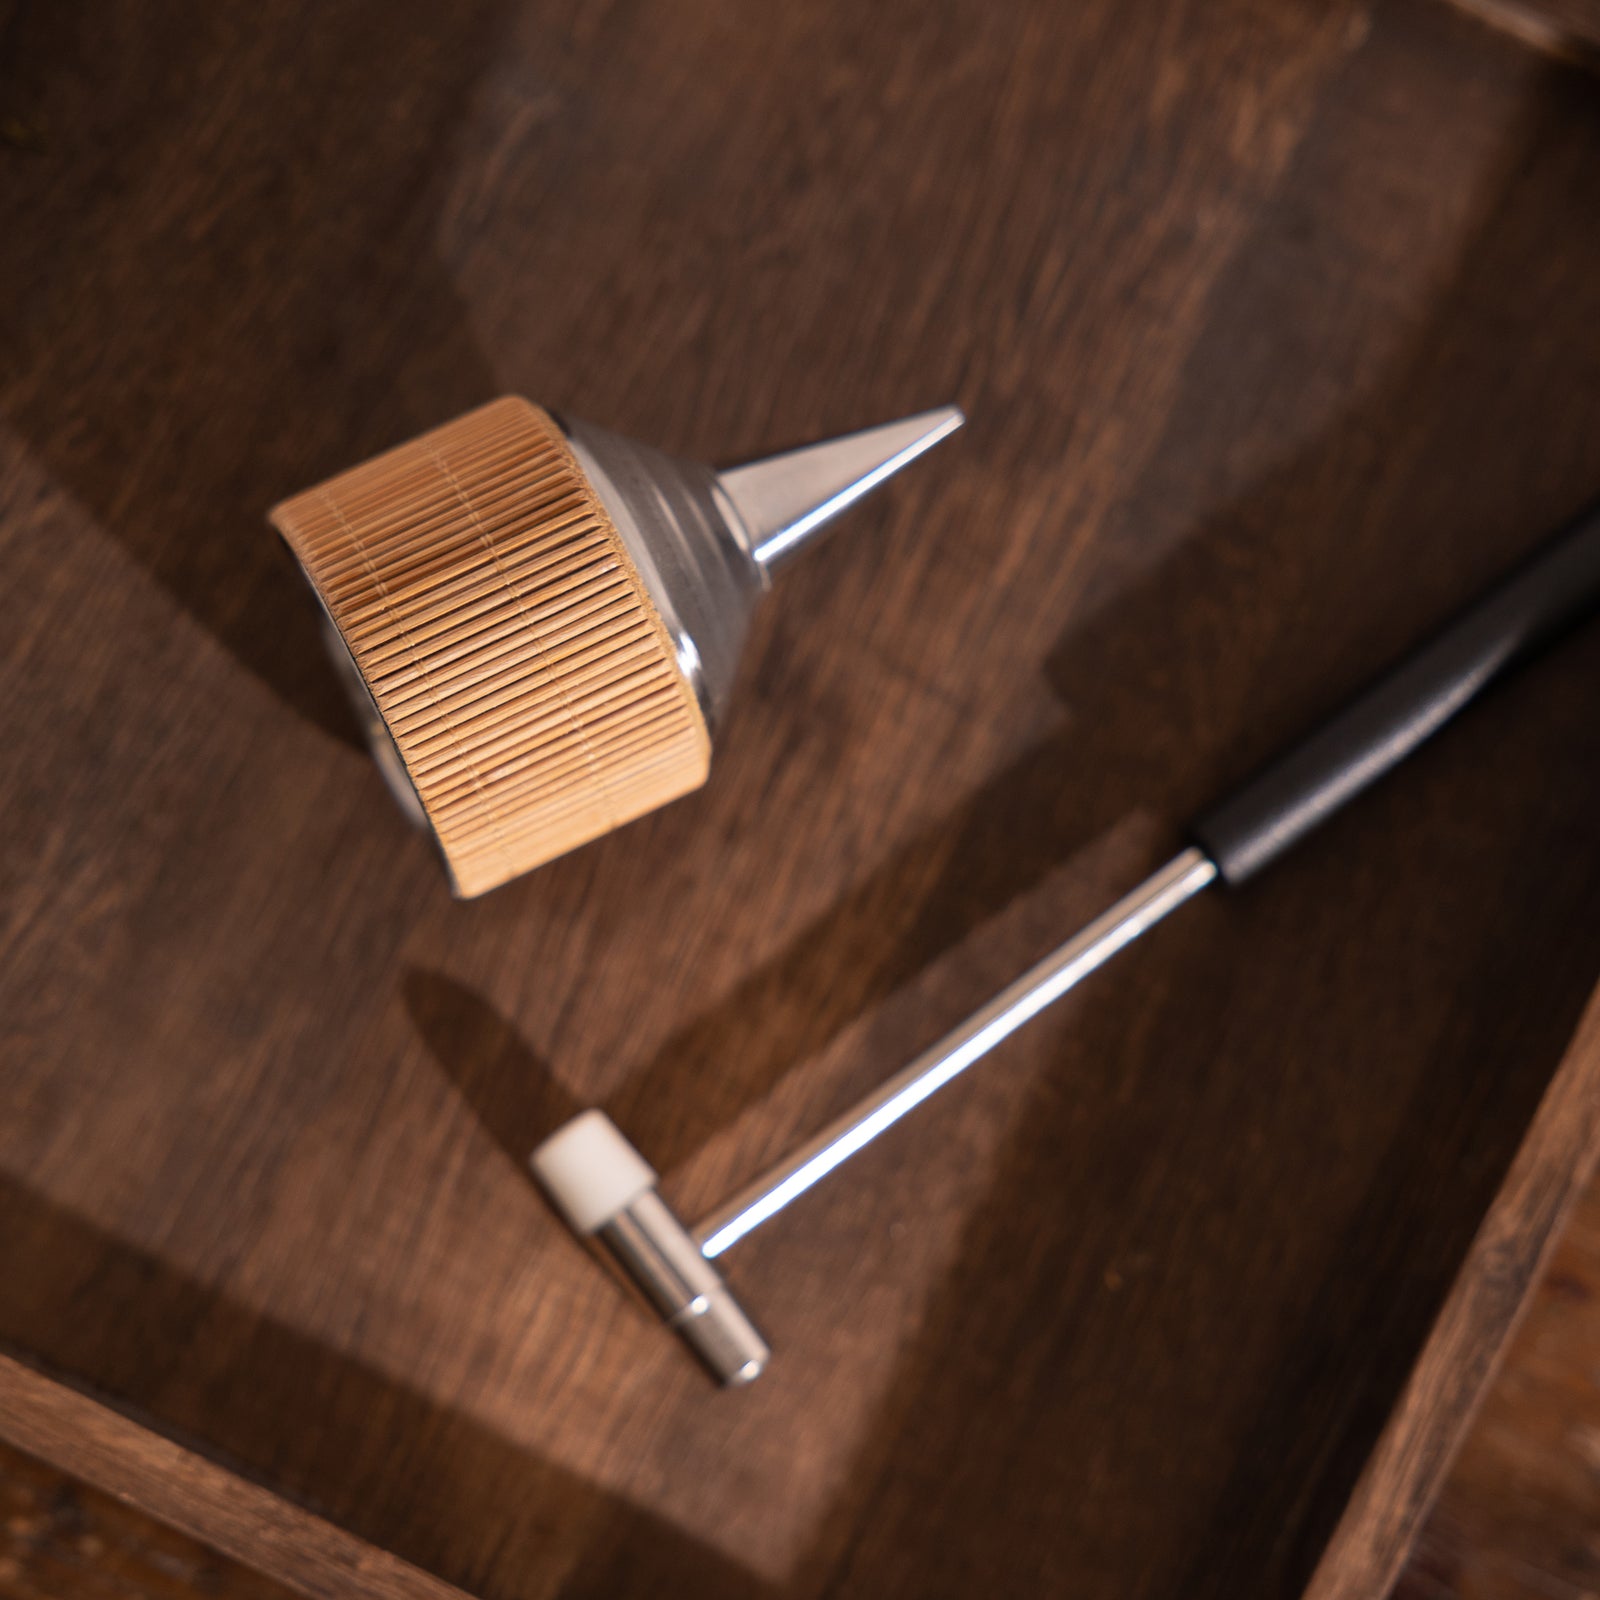
A set of metal tools - please refer to the step-by-step instructions below for details of how to use each:
-
Chopsticks
-
Ash press (香压/香壓)
-
Incense spoon (香勺)
-
Incense spatula (香铲/香鏟)
-
Incense sweeper (香掃)
-
Note: unlike the practice of heating incense up to release its fragrance (熏香, in Japanese known as Kodo), no charcoal is required
Step-by-step Instructions for burning incense powder
There are two main elements to burn powder incense, each requiring some patience and practice to master. The complete video tutorial of both steps is here, and if you prefer learning in writing or want more details of any of the steps, please also refer to the written instructions below:
This video uses our Earthen Peony incense powder burner
Preparing the white ash to burn incense powder
-
Pour desired amount of white ash into the incense holder: don't under-fill or over-fill as this makes subsequent steps difficult, approx. 3/4 full is a good start
-
Gently stir the ash with chopsticks in a clockwise motion to evenly distribute it
-
First round of ash press: the key is to press with your right, and rotate with your left. You should not be rotating your right hand around the inside of the burner
-
Hold the ash press with your right hand and press the spot right at the edge directly in front of you
-
Press clockwise next to this first press, until all the ash directly in front of you have been pressed
-
Rotate the burner with your left hand clockwise, press again
-
Continue until the burner has been fully rotated 360 degrees. All of the edge should have been pressed at this point
-
If there is unpressed loose ash at the center, press it now
-
The main aim for this first round of pressing is to just get the ash somewhat flat, it can be far from perfect
-
-
Repeat the ash pressing: repeat the previous process, each time trying to make the ash a little neater. Repeat until the ash is mostly all flat and only light imprints are visible on the ash. Don't worry if you need to repeat this many times
-
Final flattening:
-
Use the ash press to gently scrape the ash to fully flatten it out. Again work in a clockwise manner as your left hand rotates the incense holder
-
Place the scraped ash in the center of the bowl and press
-
Repeat several times until you're satisfied with the result
Don't worry if you are not able to get things perfect, especially at first. The process is suppose to be a meditative one, not one that gives you anxiety about perfection. Creating a good ash bed can take months and years of practice, there is no need to rush!
-
Creating and burning the incense seal
-
Gently place the incense mold on the ash bed: don't press this too hard or it will sink into the ash
-
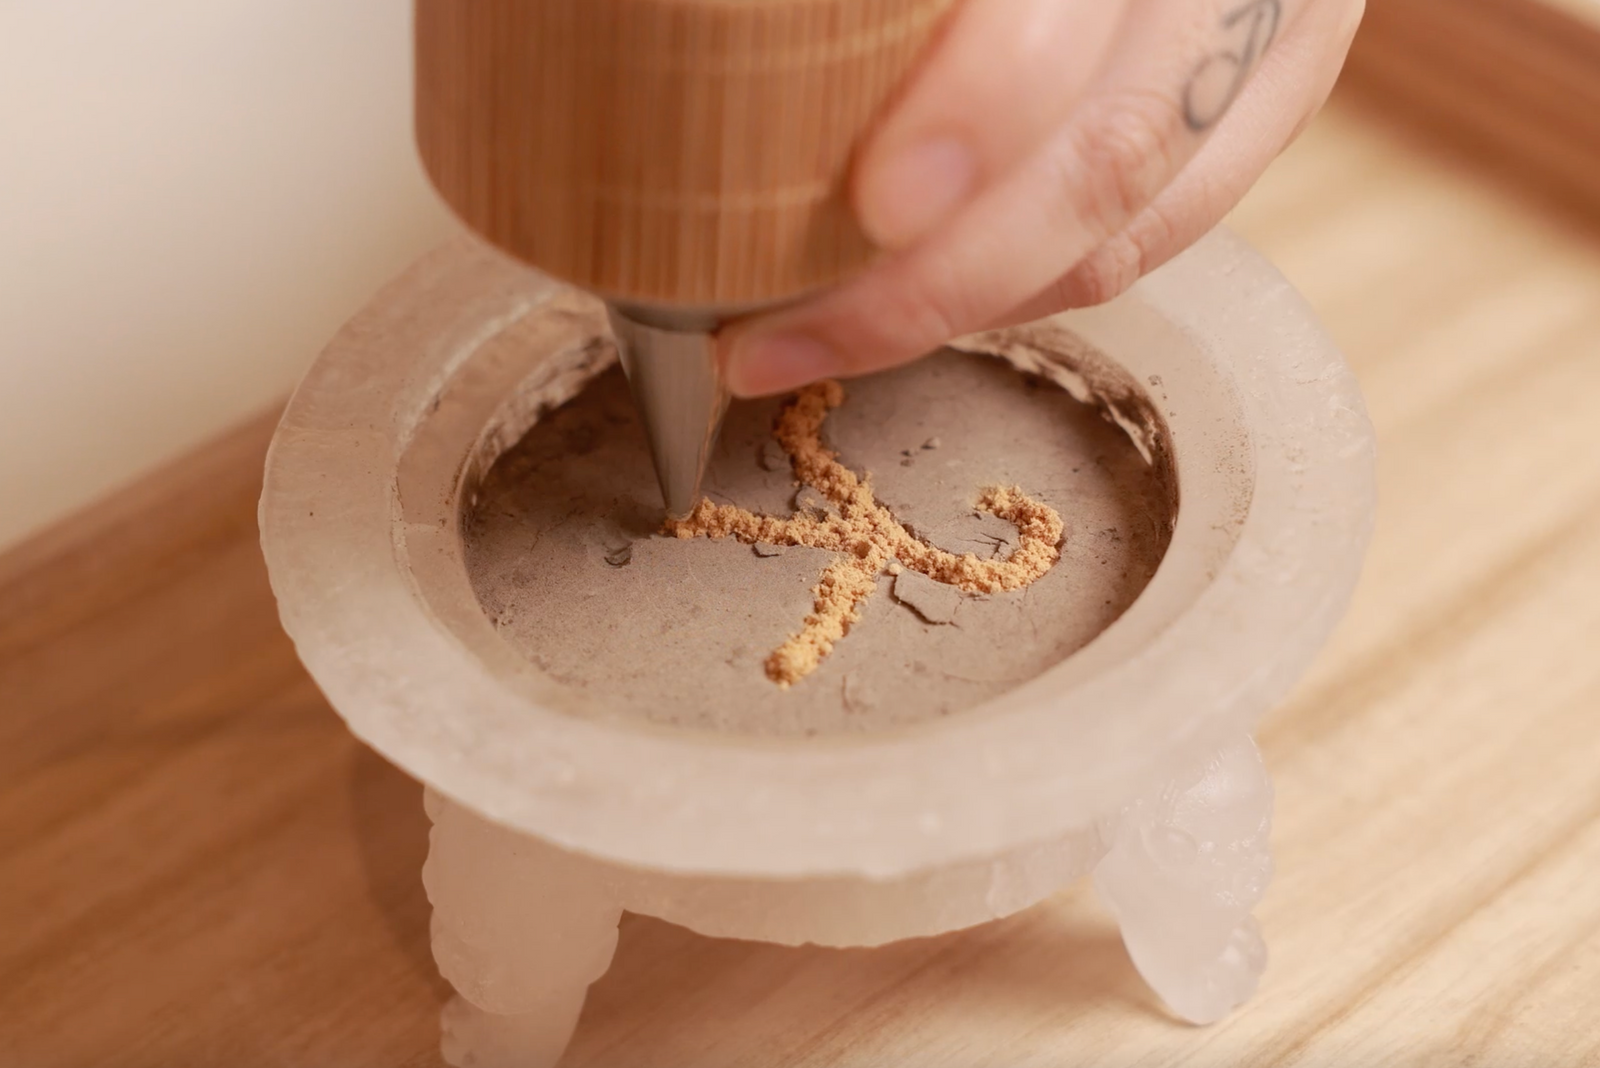
Spoon the incense powder mixture onto the mold: spoon a small amount each time, until the entire pattern of the mold is mostly covered, don't worry if the powder is not evenly distributed at this point
-
Evenly fill the mold pattern using the spatula: gently scrape over the mold so that all the parts of the pattern are filled to the same level. Don't overfill or compress the incense powder too much
-
Tap the mold to loosen the powder pattern: do this several times until you can see the powders pop out slightly from the mold
-
Remove the mold: do this in one quick motion, this gives you the best chance of leaving a complete incense seal
-
Light one end of the incense trail, fan out the flame as we typically do when lighting any incense, leaving a glowing amber. When you start seeing smoke consistently flowing out, the incense is lit - enjoy!
-
Don't throw away the incense ash! Once the trail is fully burnt, simply stir it into the rest of the ash using chopsticks. There are many benefits to keeping ash from natural incense, see the final section of this article.
What's the Best Way to Light the Incense Powder Pattern?
It can be quite difficult to light the incense seal with a regular lighter, so if you are having trouble, try these two alternatives:
- Use a small stove lighter or kitchen torch, or any lighting device with a long-ish snout for the flames, as this helps with pinpointing the starting point of the trail
- If you have an incense stick handy, use this. Simply light the tip of the incense, don't fan out the flame (as we usually do with incense), and use this flame to light the start of the incense powder trail. After you successfully light the powder, you can then put out the incense stick
What's the Best Way to Light the Incense Trails?
It can be quite difficult to light the incense seal with a regular lighter, so if you are having trouble, try these two alternatives:
-
Use a small stove lighter or kitchen torch, or any lighting device with a long-ish snout for the flame, as this helps with pinpointing the starting point of the trail
-
If you have an incense stick handy, use this. Simply light the tip of the incense, don't fan out the flame (as we usually do with incense), and use this flame to light the start of the incense powder trail. After you successfully light the powder, you can then put out the incense stick
Why won't my Incense Trails burn from Beginning to End?

This is a common problem, especially when first starting. When we make the incense powder pattern, sometimes we end up with less powder in parts of the design, especially in parts that bend and twist. These parts cause the burning to stop.
This improves with practice. As you make more and more incense seals, the amount of powder through all parts of the design will become more even. And you'll get a better handle for how best to pack the powder (not too loose, not too dense). As this happens, the burn should continue for longer and longer.
Even after practice, it is not unusual for the burning to stop a few times for designs that have multiple bends. This is not all bad - as an incense seal can often burn for a very long time (an hour or more), sometimes we like the natural stop. Just come back the next day and light up the rest to enjoy.
What is the Difference Between Burning Stick Incense and Powder Incense?
Stick incense can be directly burnt. In contrast, to burn powder incense, the powder needs to be first carefully shaped on an inflammable surface like ash before it can be burnt.
What is the White Powder Under Incense?

Traditionally, burnt incense ash from previous incense burns was used for the ash bed. This was highly desirable as the ash can enhance the fragrance of subsequent burns. Also, as the pores of incense burners absorb scent over time, keeping incense ash would even impart a faint fragrance to the incense burners.
In ancient times, incense ash was also used to treat minor skin conditions such as cuts and bites. Many incense ingredients such as sandalwood and agarwood have naturally occurring antiseptic and healing properties, and these are retained by the ash.
Today, it is time consuming and expensive to accumulate such a large quantity of incense ash, so we need to buy some to start. Modern white ash available is commonly made from one or a blend of the following ingredients:
-
Plant ash (草木灰) - certain plant materials burnt at high temperatures or using specific methods produce an odorless white ash, which is then sieved to retain only the fine particles. There are historical records on how plants should be chosen, prepared and used for this purpose
-
Diatomaceous earth (硅藻土)- this is a soft, naturally occurring type of earth that is white. Diatomaceous earth contains the fossilized remains of algae, and has very high silica content. It has a wide variety of everyday uses that you may be familiar with, including as an oral supplement for silica, and as a medicine for treating digestive system issues
-
Rice grit - essentially broken kernels of rice, commonly used in Asian cuisines. Rice grit white ash is common in Japan where it is called Miyako Hai
Some Final Cautionary Notes:
-
Do not leave burning incense unattended
-
Do not touch or get close to burnt incense powders until they are completely extinguished and completely cooled
-
Ensure air around any form of incense is well ventilated regularly
We hope this guide has been useful for you. We invite you to check out our collection of products for burning incense powder. Please also leave any questions and comments below -


Leave a comment (all fields required)